35,000RPM Cordless Nail Drill Guide: Safe At-Home Use
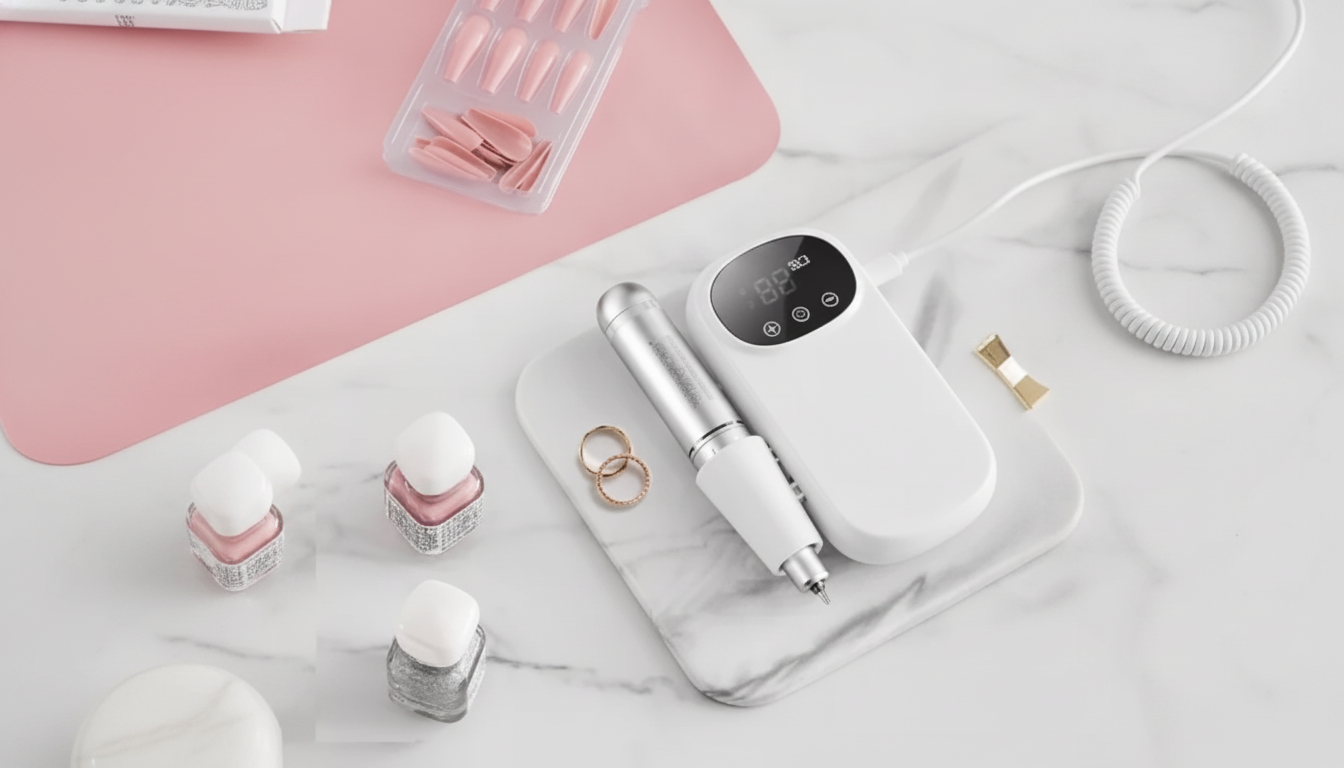
Rechargeable Electric Nail Drill 35,000RPM Cordless E File for Manicure & Pedicure
A cordless e-file can make nail prep, product removal, and smoothing feel far more manageable at home—when it delivers steady RPM control, a comfortable grip, and safe, standard bit compatibility. If you’re shopping for a rechargeable 35,000RPM electric nail drill, the goal isn’t to use max speed all the time; it’s to have enough headroom for efficient bulk reduction while keeping control for detailed work around the cuticle line and sidewalls.
If you’re ready to set up an at-home kit, consider pairing a drill with practical workspace add-ons like the Rechargeable Electric Nail Drill 35,000RPM Cordless E File for Manicure Pedicure, a tidy tool station like the Metal Pen & Pencil Organizer – Rose Gold & Gold Desktop Holder for Office & Home (great for brushes, files, and bits), and basic home safety items such as the 6-Pack Silicone Baby Safety Socket Covers – European Outlet Childproof Guards if your nail area is near outlets.
What a 35,000RPM Cordless E-File Helps With
- Manicure prep: refine surface shine, remove residual product near the cuticle area (without touching skin), and smooth ridges on artificial enhancements.
- Removal work: reduce bulk of gel, polygel, dip, or acrylic overlays faster than soaking alone (finish with gentle hand filing).
- Shaping and refining: perfect sidewalls and free edge after tips or overlays are applied.
- Pedicure support: smooth callused areas cautiously with appropriate bits and low-to-moderate speed; avoid over-filing sensitive skin.
- Time and consistency: steadier RPM and controlled torque reduce skipping and help keep the finish uniform.
Key Features to Check Before Buying
- RPM range and stability: a wide range is useful, but consistent speed under light pressure is what keeps work predictable.
- Forward/Reverse direction: helpful for both left- and right-handed use and for switching sides of the nail without awkward wrist angles.
- Battery and charging: look for rechargeable operation that supports longer sessions without performance drop-offs; a clear battery indicator is a plus.
- Comfort and control: a balanced, pen-like handpiece and low vibration reduce fatigue during detailed cuticle-area work.
- Heat management: prolonged high-speed use can warm the handpiece/bit; use short passes and moderate RPM when refining.
- Bit compatibility: standard shank compatibility and secure locking make it easier to use common sanding bands and carbide/ceramic bits safely.
- Noise level: quieter tools can make longer sessions more comfortable, especially in shared spaces.
Also plan your workspace like a mini “service station”: good lighting, a stable chair, and a cleanable surface. For dust and air quality basics, review guidance on ventilation from the CDC and nail service safety considerations from OSHA.
Speed Guide: Practical RPM Ranges for Common Tasks
Max RPM is only useful if you can control it. Start slower than expected and increase gradually; use minimal pressure and keep the bit moving to reduce heat and “rings of fire.” For natural nails, stay conservative and favor fine grit attachments. For removals, reduce bulk in layers and finish with a softer grit or hand file.
| Task | Suggested RPM | Bit/Attachment Notes | Safety Notes |
|---|---|---|---|
| Cuticle-area cleanup (around enhancement only) | 5,000–10,000 | Fine diamond or safety bit | Avoid skin contact; use light pressure and short strokes |
| Surface prep on enhancements | 8,000–12,000 | Fine sanding band / buffer bit | Do not thin the natural nail plate |
| Gel or dip bulk reduction | 12,000–20,000 | Medium sanding band or ceramic bit | Keep the bit moving to prevent heat spots |
| Acrylic bulk reduction | 15,000–25,000 | Carbide or ceramic bit (appropriate for product) | Work in passes; stop if warmth is felt |
| Refining shape and smoothing | 8,000–15,000 | Fine grit sanding band / finishing bit | Finish with hand file for edges if needed |
| Pedicure callus smoothing (cautious) | 8,000–15,000 | Pedicure-specific sanding cap/disc | Avoid over-filing; do not use on irritated or broken skin |
Safe Setup: Bits, Grip, and Hygiene
- Choose the right bit: match material and grit to the job (fine for refining; medium for removal). Hold off on aggressive bits until your technique is solid.
- Secure installation: insert the bit fully and lock it per the device mechanism; a loose bit can wobble and scratch the nail surface.
- Hand position: brace fingers together and stabilize by resting a pinky or the side of your hand for precision.
- Angle control: work nearly parallel to the nail surface for smoothing; avoid digging in with the tip.
- Dust control: wear a mask, keep your workspace clean, and avoid letting dust circulate. Good airflow matters.
- Disinfection: clean and disinfect reusable bits between uses according to product instructions; don’t share bits without proper sanitation.
- Skin protection: never drill into live skin; stop immediately if redness, heat, or pain occurs.
For everyday nail health habits that pair well with at-home e-file use, follow practical nail care basics from the American Academy of Dermatology.
Step-by-Step: Manicure Removal and Refinish Workflow
Care and Troubleshooting for Cordless Drills
FAQ
Is 35,000RPM necessary for home manicures?
No—maximum RPM matters less than stable control, comfortable handling, and predictable power. Many home tasks sit in moderate ranges, while higher RPM is mainly helpful for faster bulk reduction when used carefully and in short passes.
Can a cordless nail drill be used on natural nails?
Yes, but it should be used conservatively: lower RPM, fine grit attachments, and minimal pressure. Avoid thinning the natural nail plate; if you’re unsure, switch to hand filing for final refinement.
How often should nail drill bits be cleaned or replaced?
Clean and disinfect reusable bits after each use, following the bit manufacturer’s instructions. Replace sanding bands every session, and replace reusable bits when they become dull, damaged, or difficult to sanitize thoroughly.









Leave a comment